
Shereen at Waiting for Him hosts Sew Crafty Friday.
Ok, I’ve come to the conclusion that I need to take a class on how to finish a quilt.
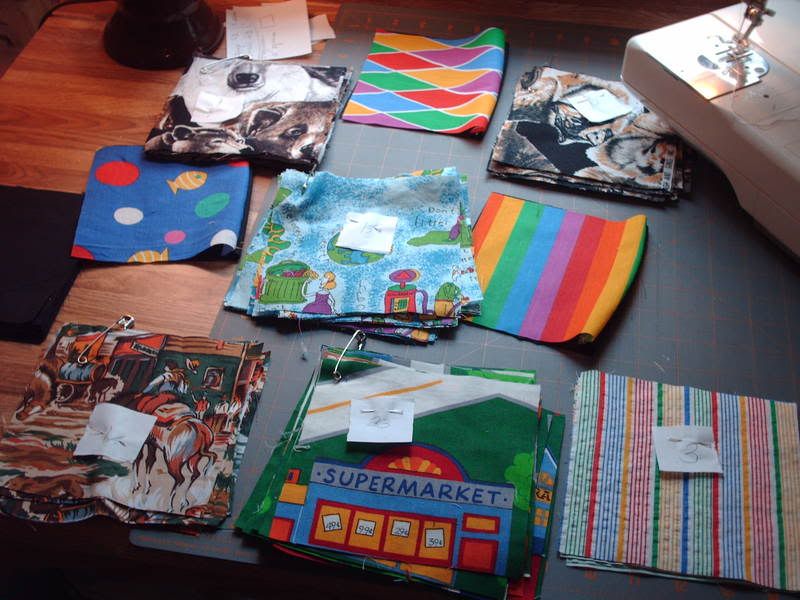
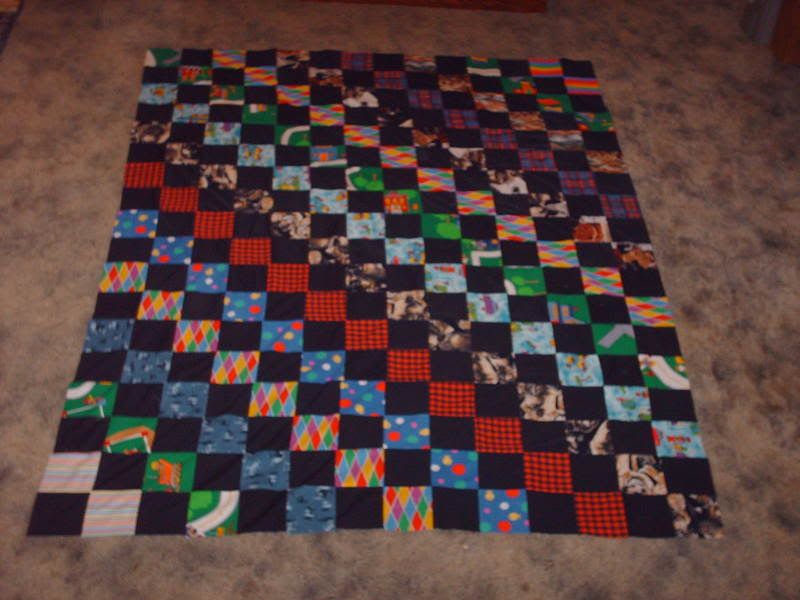
I have wanted to make a quilt for my oldest son from the scraps of fabric from things I have made for him that I have been saving over the years. I have been working on this project for some time. I started cutting squares from scraps before Christmas, but set it aside for other things. As time has allowed, I continued to cut 5 ½ inch squares and 2 ½ squares from an array of materials. I have been working on this diligently the past 2 weeks. When I thought I had enough squares I chose black as a corresponding color because it was a neutral color and cut out the squares for that.
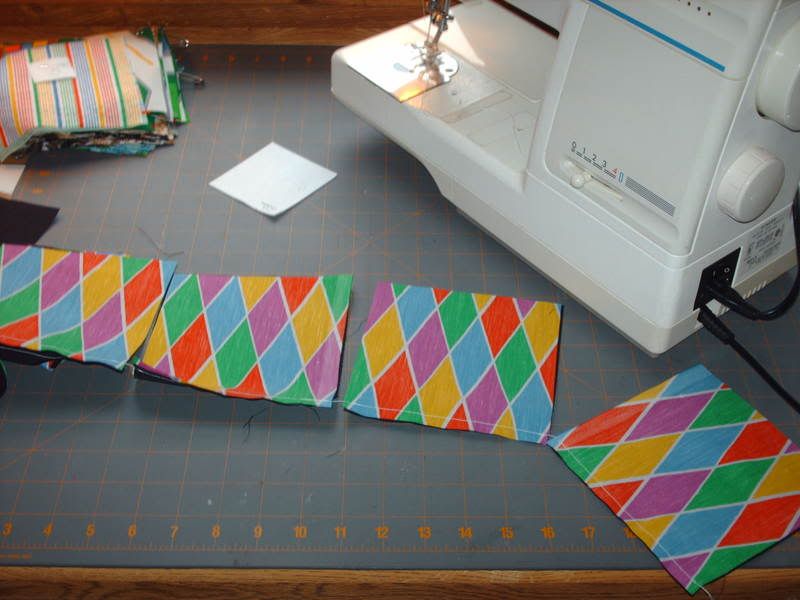
 I decided to just use the 5 ½ squares and will use the smaller squares some other time. Now I had no trouble putting the squares together. I used the hint I saw on someone’s blog about stitching them in one long stream of squares and that worked out great.
Then I laid the squares all out on the floor to get the pattern design. Because there was such a variety of patterns and textures in the fabrics, I opted for a simple pattern.
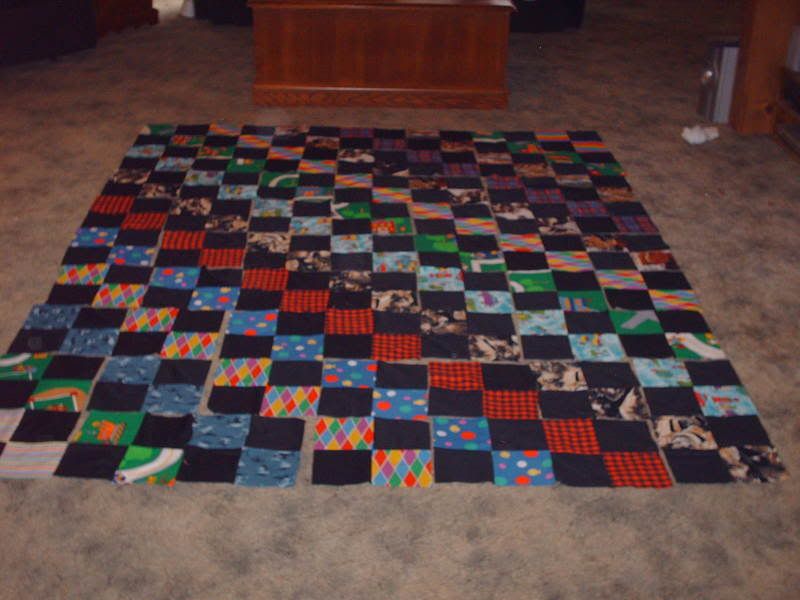
I stitched them together and had the quilt top done in no time.
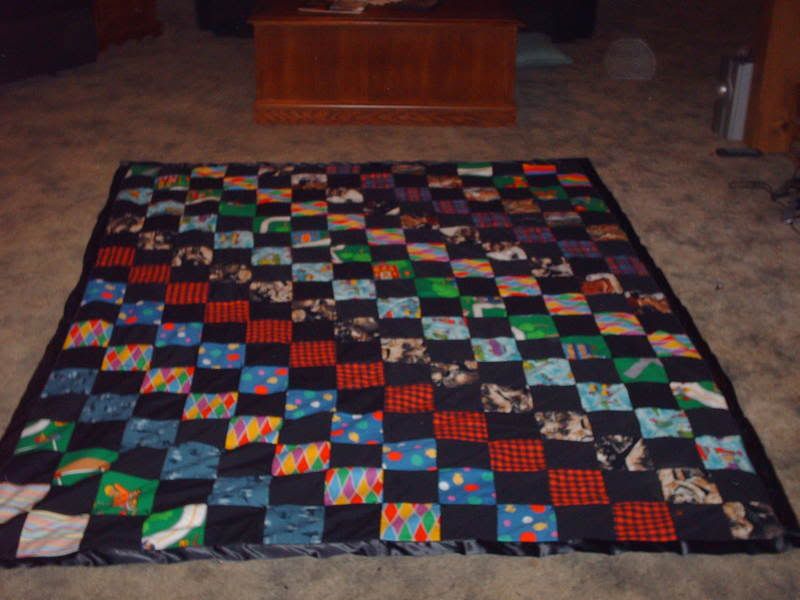
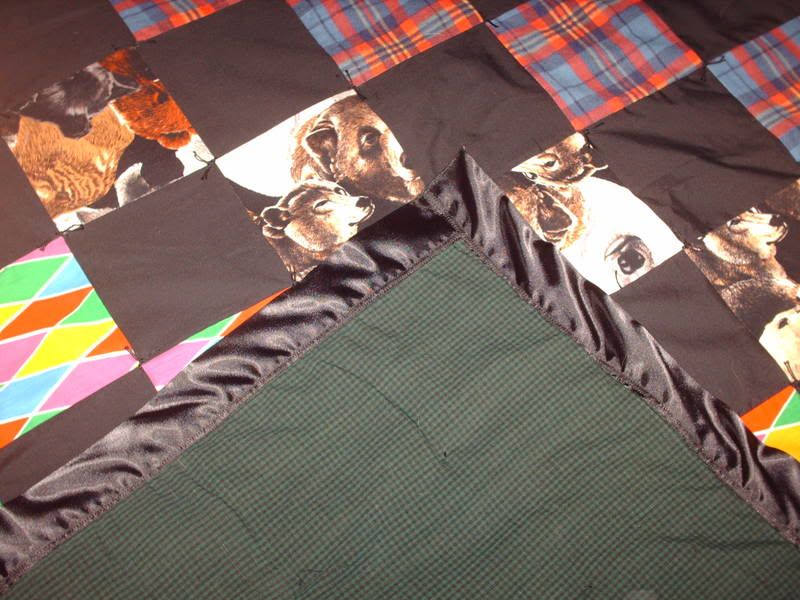
Now comes the part that I always dread. I laid out my cardboard sewing board and another large piece of cardboard to make a large enough flat surface. I followed the directions for making the ‘sandwich’ and then did all the pinning. I took my time knowing how important this part was and was satisfied with the job. Then I decided to make this a tied quilt, mostly out of the fear I would mess it up if I tried sewing it. So far everything was going great and after I finished tying it looked smooth and good. (forgot to take pics of this) Then the book said to trim the batting and bottom fabric so I did this leaving about 4 inches all the way around. Then I took it to the machine to stitch around the edges. I used an even feed foot like the book suggested. This is where it messed up somehow the bottom fabric ended up not being enough on one bottom corner. UGH! I was able to get it to be about 1 inch shy of the top. I figured that I could put a label there to cover the booboo. After I put the edge on, I zigzagged stitched until I filled in the messed up white space.
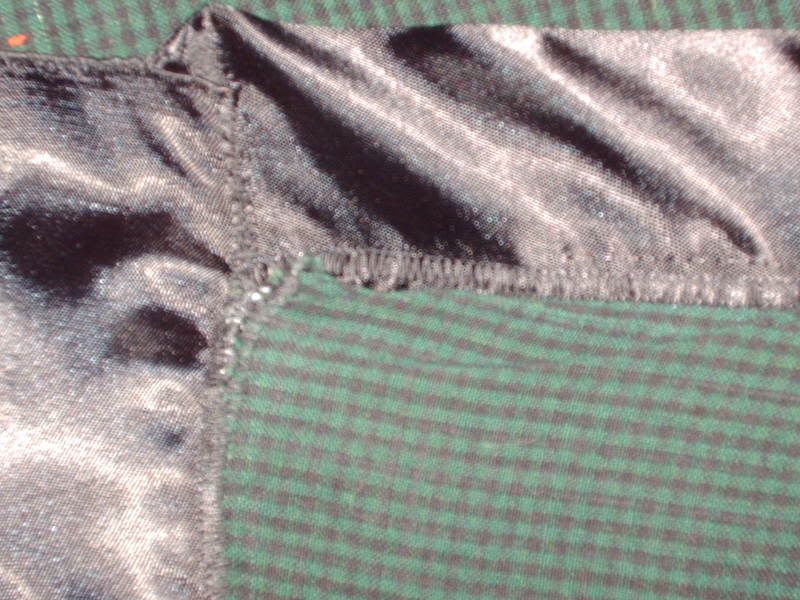
I decided to use regular silky blanket edging all the way around. I love the feel of that when snuggling in a blanket. This quilt is 74 inches by 94 inches. I’m satisfied with the end result although frustrated that I can’t seem to do the ‘sandwiching’ part without problems. Oh well. I hope that I’ll get better so when I make the other two kids their quilts in 8 to 10 years I’ll have mastered my troubles.


Oh my, that's beautiful, Ginny! No one will even notice the mistake. I think it turned out great :-)!
Terri
http://www.heartsinservice.blogspot.com
It looks great! Our mistakes are always much more noticeable to us than to anyone else. Good job!
Gina
http://asustainedlife.blogspot.com
Oh it's too bad there was a glitch at the end. It looks great though!
Blessings,
Laurie
Oh that is so pretty! Wish I was talented in that area:) All I can do is minor, and I do mean minor mending:)
Would it make you feel any better that I don't even know what sandwiching is?
And I totally GET the SC post below. I lived there a long time, and some of those things are very true….except we definitely lock our doors in the Charleston area.