 For some time now I had been trying to figure out a easy way to keep track of what is in my upright freezer in the garage. A lot of my packages are wrapped in foil and even though I label the packages, I often times have trouble remembering what is actually in there. I do tend to keep certain things on certain shelves but this isn’t always helpful when I just want to know what needs replenishing on grocery days. At one time I had a list that I kept in my home binder, but I admit to being negligent in keeping it updated. It just wasn’t convenient to pull out the binder and add or cross out items as they came in and went out of the freezer. I thought that if I had a way right there at the freezer to track everything, perhaps that would make it a bit easier.
I have seen some really great ideas for keeping track. One that I really loved involved making magnets with the picture of the food on them, then moving them from one side of the freezer door front to the other as you add or remove items. So last week I set out to do this project. Problem was I could not find the magnetic printable sheets that would have saved many steps in the project. But as I was on my hunt for the magnetic sheets, I was lucky enough to stumble upon an awesome special at our local Staples store. They had 23 inch by 35 inch magnetic dry erase boards on sale for $3.50. My brain completely switched gears and I quickly snagged up two of those bargain boards, one for the intended project and the other for a future project. I then made a quick stop at Hobby Lobby to search for some very thin tape because I wanted to make permanent lines down the board that would not wear out or disappear with use. I found 1/16” black tape in the artist section that was perfect for what I wanted to do and had my 40% off coupon to boot so it cost $1.49 for the roll. Then I put my idea to work.

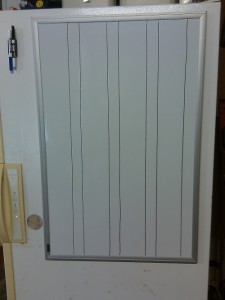
Blank Freezer Inventory Board
First I measured out the board and found the center. Using a straight edge, I ran a strip of tape down the center of the board. Then I divided each of those two sections in two and ran two more strips of tape, dividing the board into 3 sections. Then I measured and lightly marked the board with a dry erase marker, 2 inches to the left of each line and the farthest edge of the board, and ran a strip of tape from top to bottom at those marks. The board now had 8 sections, 1 wide and 1 thin repeated across the board.
Originally, I had put sticky back Velcro that I had on hand on the bottom and top of the back of the board, but this past week’s warm weather revealed a problem. Light condensation formed on the freezer door and caused the sticky back to become unstuck and down the board came. So this weekend, we picked up 4 heavy duty magnets at Lowes for $5.46 (the most expensive part of this project). I removed the Velcro from the board and freezer door, cut 4 pieces of the Velcro, stuck the loop piece of the Velcro onto each magnet and the other part onto the 4 corners of the board so that when the Velcro is latched the magnet is attached to the board. So far it is working like a charm and no more fallen board. I think this method will also keep the board from warping because the air is flowing in between the board and the freezer door.

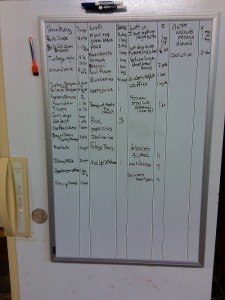
Our Filled Out Freezer Inventory Board
Total cost of this project-$10.45
The way we are keeping track now is in the big column I write what is in there and in the thinner column I put how many. When we take something out or add something it is now super simple to make the inventory changes.
How do you keep track of your freezer inventory?


This is an EXCELLENT idea. Our freezer is a really big chest-style freezer and I often have no clue what all is in there. 🙂
I bet you could do this horizontally on a chest freezer. You could either attach it to the top or the front. Or if you had any wall space beside the freezer you could just hang it up.