Have you ever seen those wire mesh birdfeeders at the home improvement store? Well, a couple of years ago I came up with an idea that I could make my own and it has been a hit with the birds in our yard ever since. This is how I made a 2 foot tall bird feeder. 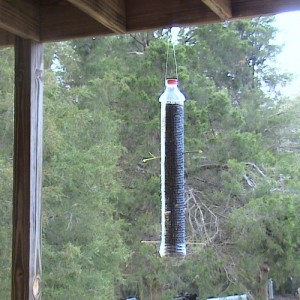 Materials:
- wire mesh fencing (we used fencing that was 2 feet tall and has a mesh size of about ¼ inch)
- an empty juice jug, (we used an empty V8 Fusion bottle, but I would think any good size round bottle would work.)
- fishing line (we used 10 lb test)
- sewing tape measure
- scissors
- razor knife
- wire cutters
- some twisty ties
- a yarn needle
- a nail
- a crochet hook
- a piece of wire about 18 inches long (if you don’t have any wire you can cut a strip from your wire mesh, trimming off the sharp edges.)
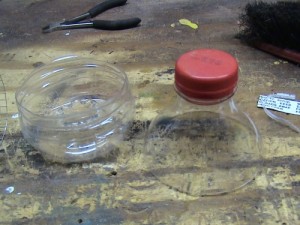 1. Using the razor knife, cut the top of the bottle off approximately 4 inches from the top of the cap. Set aside. Then cut off the bottom of the bottle approximately 2 inches from the bottom. Set aside. Discard the remaining section of the bottle.
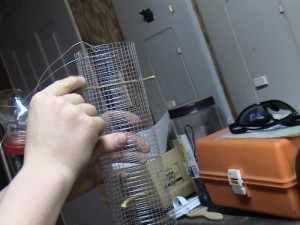
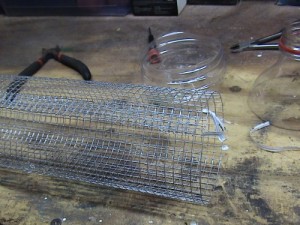 2. Using your sewing tape measure, measure the outside circumference of the bottom section of the bottle to help determine how wide you will need to cut the fencing. I added about another inch or so to that measure. Then using your wire cutters cut the fencing to your measurements. I cut the wire close to the mesh boxes so that I would not have too many sharp edges. I folded over about 2 boxes in the length along the edge to turn the sharp edges in. Next I formed a tube and fit the tube into the bottom of the bottle I had cut, overlapping the long edges. I temporarily secured the edges together with a few twisty ties overlapping a little. Double check that the tube will still fit inside the bottom and top you cut out. Adjust as needed to be sure the tube will fit.
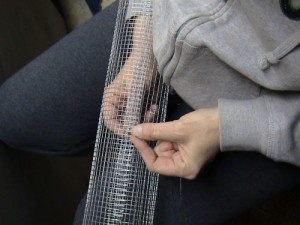 3. Thread the yarn needle with a long length of fishing line. Tie the end of the fishing line to the bottom of the bird feeder where the edges meet and then proceed to “sew’ the wire edges together where they overlap, folded edge on the outside. This was a little bit difficult at times but I found if I put my arm into the tube I could more easily pass the needle back and forth to stitch. Try to be sure that you keep the mesh lined up and even. Tie off the end and secure.
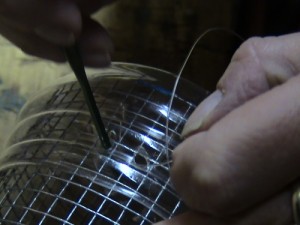 Slide the bottom of the bottle you cut over the end of your tube and using a nail, poke through the plastic about ½ an inch from the cut edge and through a mesh hole all the way around about a ½ apart. Then using another length of fishing line tie one end through one hole and knot. Feed the fishing line through the holes and the mesh. I found using a crochet hook really helped as I blanket stitched over the edge of the plastic bottom and through the mesh all the way around securing the bottom of the bottle to the mesh tube.
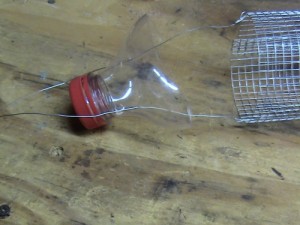 5. Take your piece of 18” wire and secure it to the top of your mesh tube. Using your nail, poke two holes opposite each other into your cut bottle top. Feed one end of the wire in through the inside of the top and out, then down through the top of the other hole from outside to the in. Next secure the end to the other side of your mesh tube. Bend the wire to evenly ‘fold’ in half at the top.
6. Use thin sticks that you picked up around the yard, and push them through wherever you would like perches for the birds. This works out great because you can put as many or as few perches as you like.
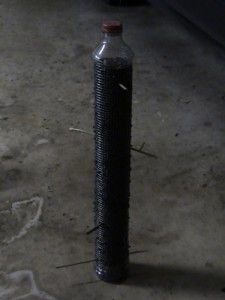 7. Now stand up the feeder and fill with seed, slide the top down, and hang for your feathered friends to enjoy. We always fill our feeders with sunflower seeds, but I would think mixed feed would work fine too.
As you can see in comparison to my 6’ 5” son, this is a large bird feeder. This was not hard to make and only took me about an hour or so to put together. We have regular visits from chickadees, cardinals, finch, titmouse, and there are even a pair of woodpeckers that visit regularly. I wish I had a picture of the birds at the feeder but whenever I try to take a picture, they always seem to scatter. But if I ever get a good shot I will have to post.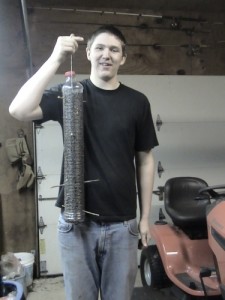
If my instructions are not clear and you are going to attempt to make this feeder for your yard, don’t hesitate to leave me a comment or drop me a line and I will be happy to clarify.







3 Responses to Homemade Wire Mesh Birdfeeder